
A Pocket-Sized Terminal for Mobile Python Hacking

Inspired by the good old days when your computer would boot directly into BASIC, [Le Roux Bodenstein] has created a handheld device he calls “DumbDumb” that can drop you into a MicroPython environment at a moment’s notice. If that doesn’t interest you, think of it this way: it’s a (relatively) VT100 compatible serial terminal with a physical keyboard that can fit in your pocket.

Being essentially just a dumb terminal (hence the name), there’s actually not a lot of hardware on the board. Beyond the 320×240 NewHaven 2.4 inch LCD, there’s just an STM32G071R8 microcontroller and a handful of passives. Plus the 57 tactile buttons that make up the keyboard, of course.

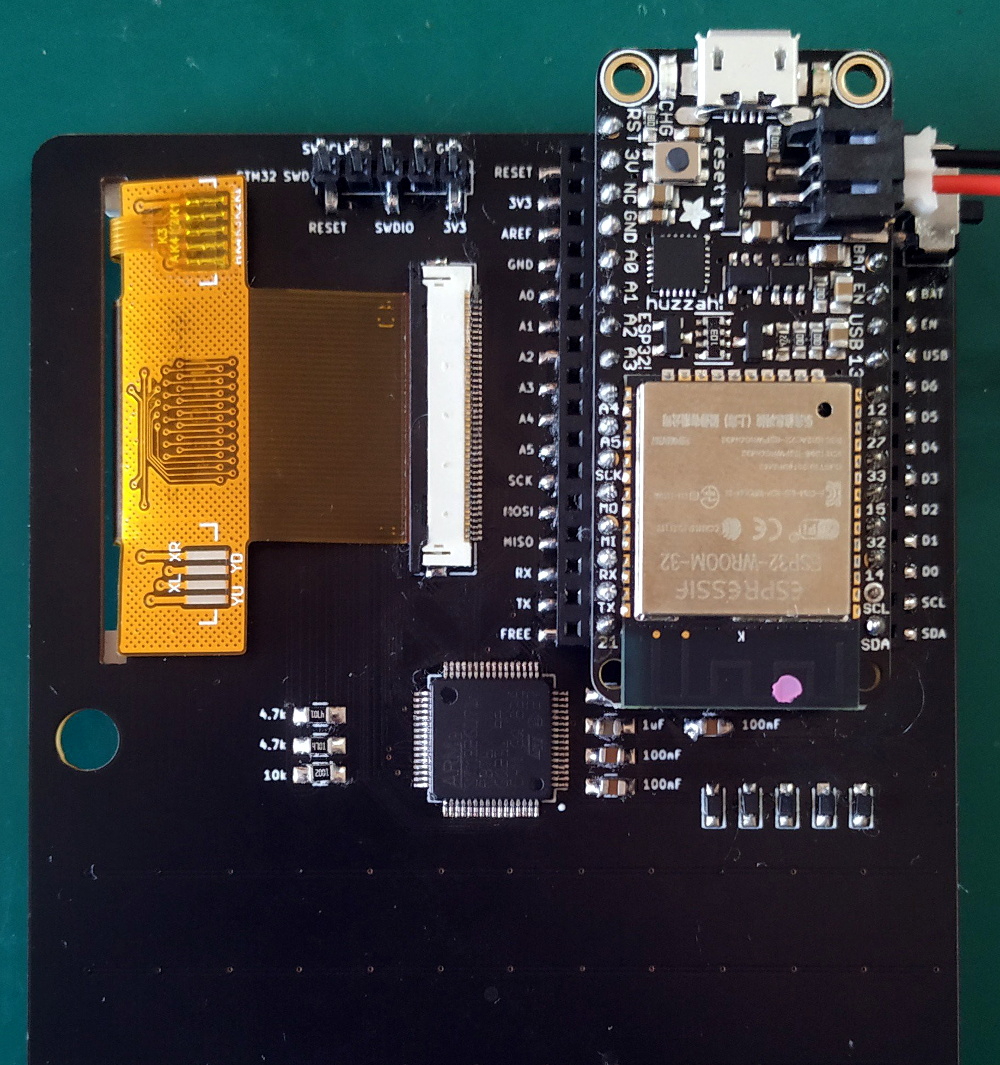
The MicroPython part comes in thanks to the spot on the back of the board that accepts an Adafruit Feather Wing. In this case, it’s the HUZZAH32 with an ESP32 on board, but it could work with other variants as well. With the wide array of Feather boards available, this terminal could actually be used for an array of applications.

So even if fiddling around with MicroPython isn’t your idea of a good time, there’s almost certainly some interesting software you could come up with for a tiny network-attached terminal like this. For example, it might be just what you need to start working on that LoRa pager system.


from Hackaday https://ift.tt/2SyN3QL

Comments

Popular posts from this blog

How To Play Doom – And More – On An NES

Doom was a breakthrough game for its time, and became so popular that now it’s essentially the “Banana For Scale” of hardware hacking. Doom has been ported to countless devices, most of which have enough processing ability to run the game natively. Recently, this lineup of Doom-compatible devices expanded to include the NES even though the system definitely doesn’t have enough capability to run it without special help. And if you want your own Doom NES cartridge, this video will show you how to build it . We featured the original build from [TheRasteri] a while back which goes into details about how it’s possible to run such a resource-intensive game on a comparatively weak system. You just have to enter the cheat code “RASPI”. After all the heavy lifting is done, it’s time to put it into a realistic-looking cartridge. To get everything to fit in the donor cartridge, first the ICs in the cartridge were removed (except the lockout IC) and replaced with custom ROM chips. Some modifica...

The Flexible Permanence of Copper Tape Circuits

Somewhere between shoving components into a breadboard temporarily and committing them to a piece of protoboard or a PCB lies the copper tape method. This flexible Manhattan-style method of circuitry formed the basis for [Bunnie Huang]’s Chibitronics startup, and has since inspired many to stop etching boards and start fetching hoards of copper tape. [Hales] hit the ground running when he learned about this method , and has made many a copper tape circuit in the last year or so. He offers several nice tips on his site that speak from experience with this method, and he’ll even show you how to easily work an SMD breakout board into the mix. Generally speaking, [Hales] prefers plywood as the substrate to paper or cardboard for durability. He starts by drawing out the circuit and planning where all the tape traces will go and how wide they need to be. Then he lays out copper traces and pads, rubs the tape against the substrate to make it adhere strongly, and reinforces joints and laps w...

The Newbie’s Guide To JTAG

Do you even snarf? If not, it might be because you haven’t mastered the basics of JTAG and learned how to dump, or snarf, the firmware of an embedded device. This JTAG primer will get you up to snuff on snarfing, and help you build your reverse engineering skills. Whatever your motivation for diving into reverse engineering devices with microcontrollers, JTAG skills are a must, and [Sergio Prado]’s guide will get you going. He starts with a description and brief history of the Joint Test Action Group interface, from its humble beginnings as a PCB testing standard to the de facto standard for testing, debugging, and flashing firmware onto devices. He covers how to locate the JTAG pads – even when they’ve been purposely obfuscated – including the use of brute-force tools like the JTAGulator . Once you’ve got a connection, his tutorial helps you find the firmware in flash memory and snarf it up to a file for inspection, modification, or whatever else you have planned. We always apprec...