
The latest Powerbeats bring Pro-style updates to a tethered design at $149

After several weeks worth of leaks, the latest version of Apple/Beat’s Powerbeats arrive this week. One key thing many of the rumors got wrong is the name. There will be no Powerbeats 4 — not for now, at least. Instead, the company’s somewhat confusingly doing away with the number scheme in favor of the simpler “Powerbeats” name.

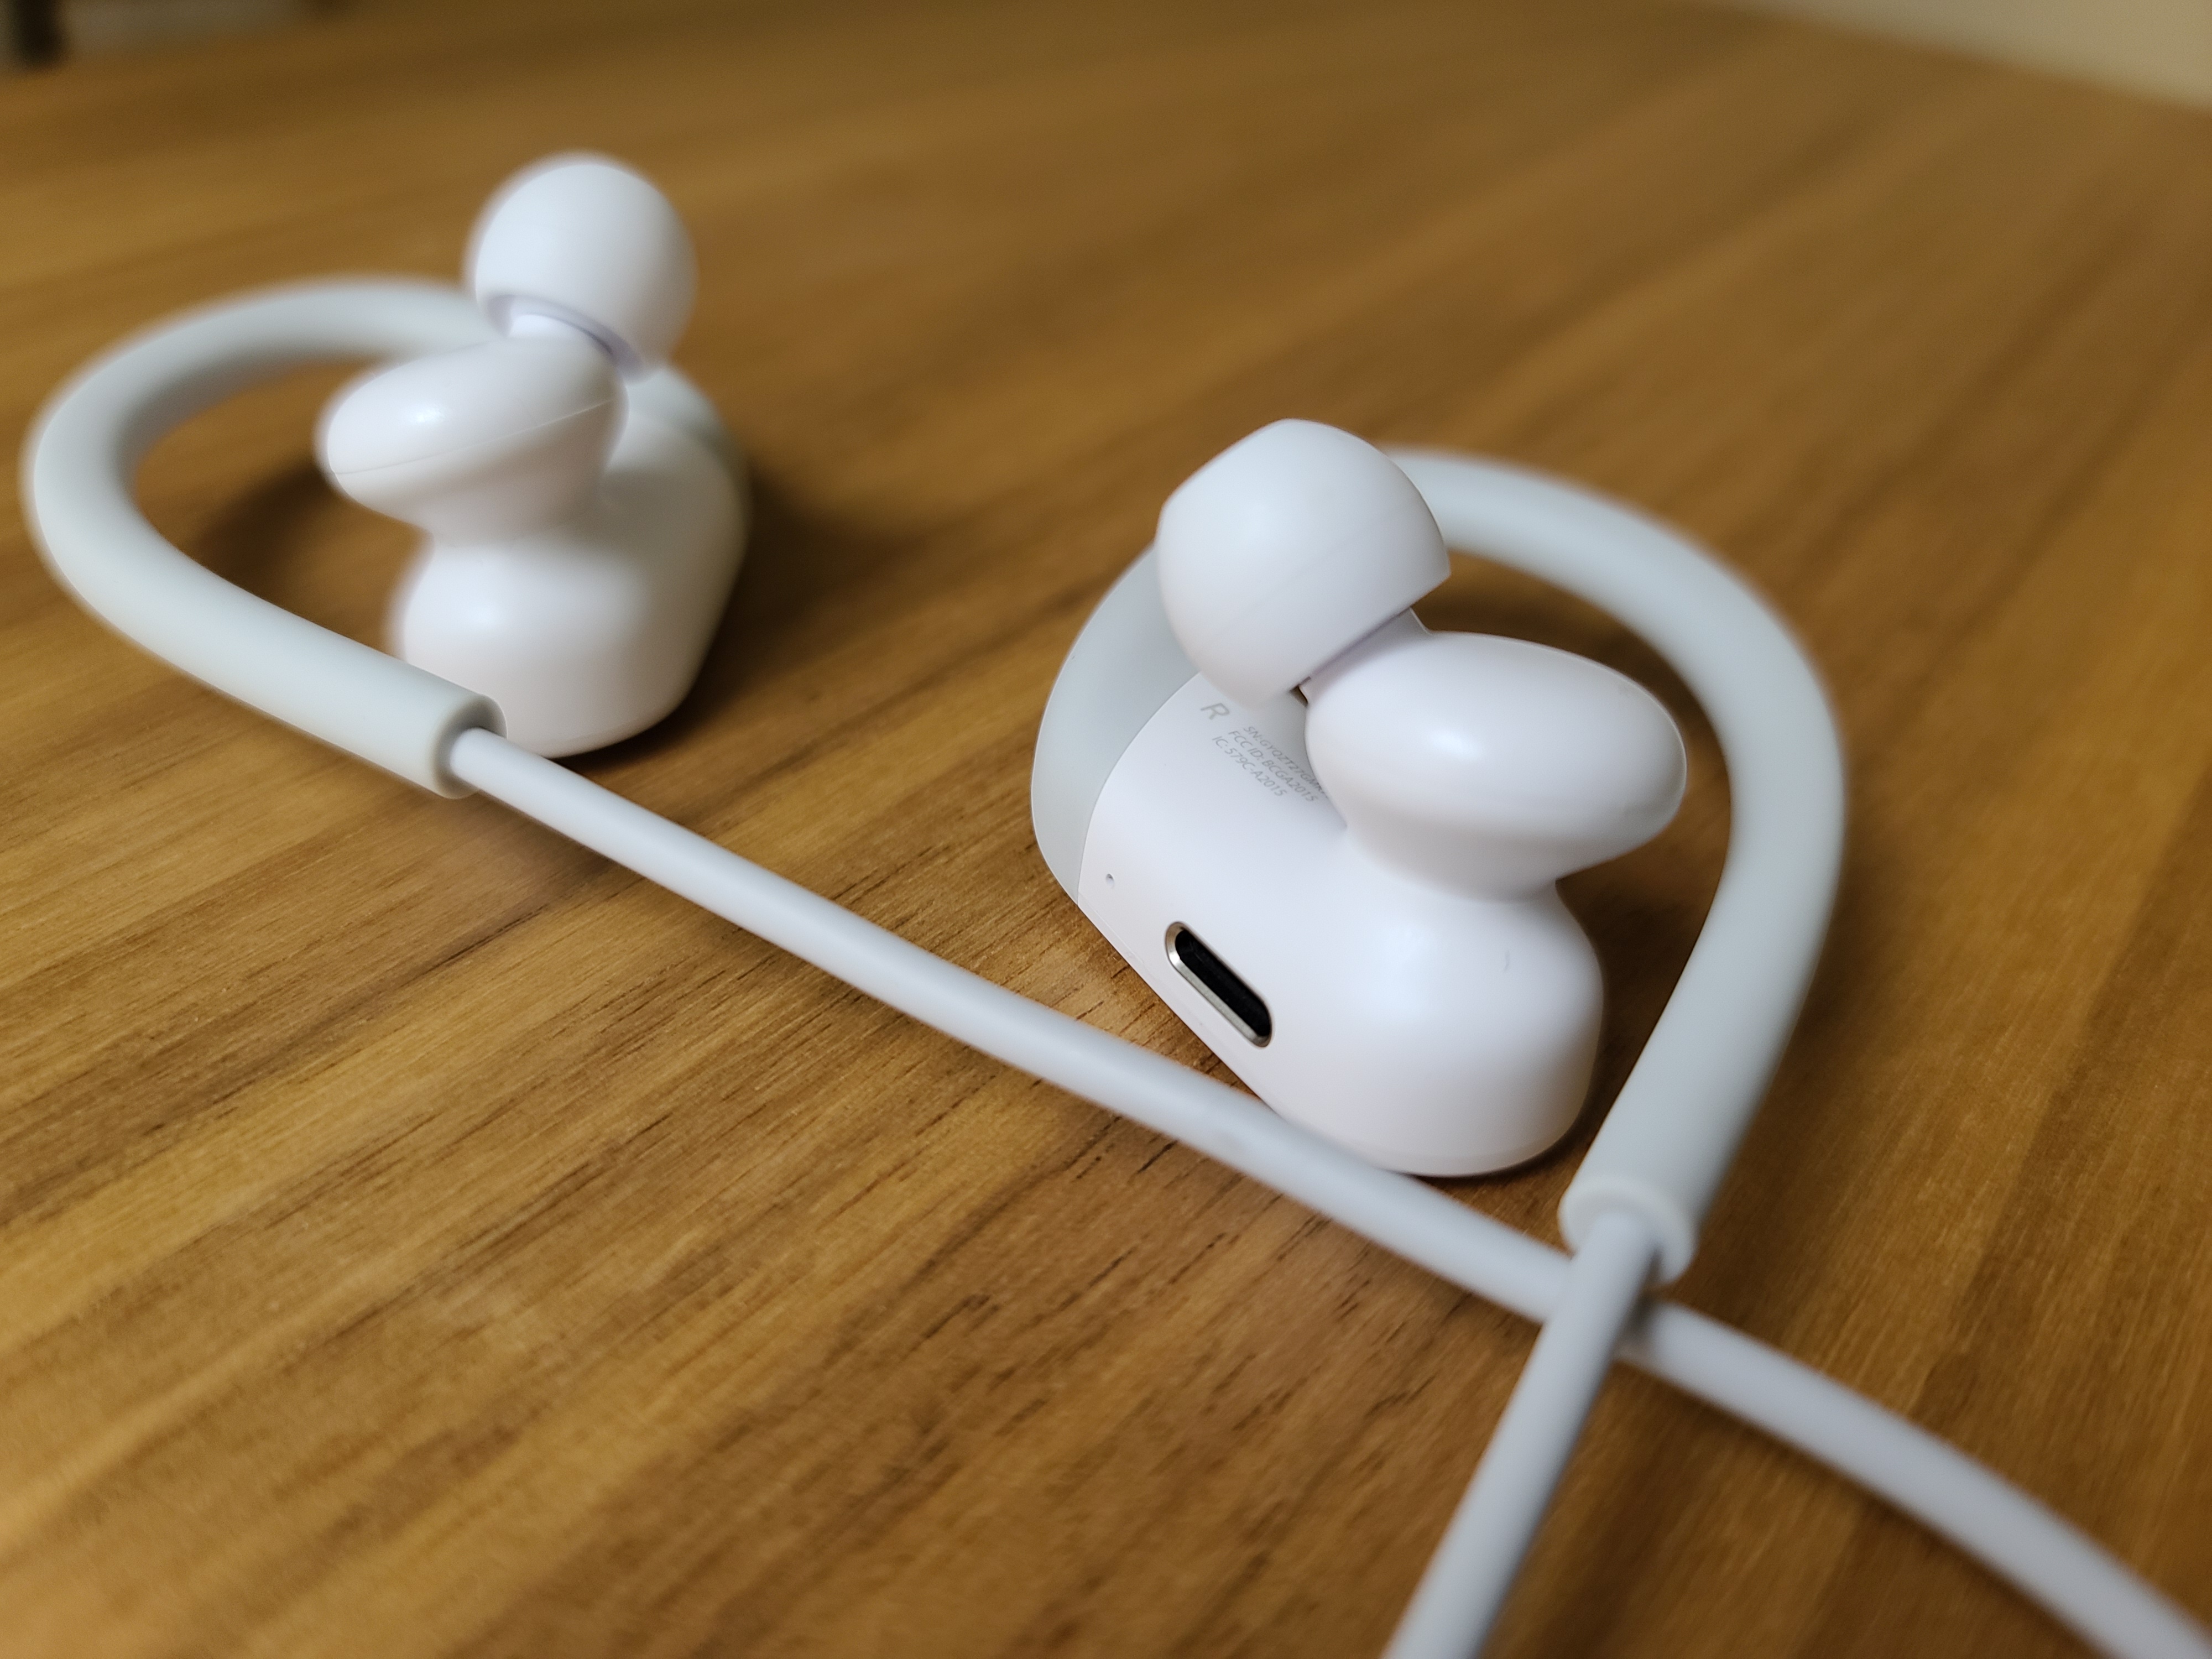
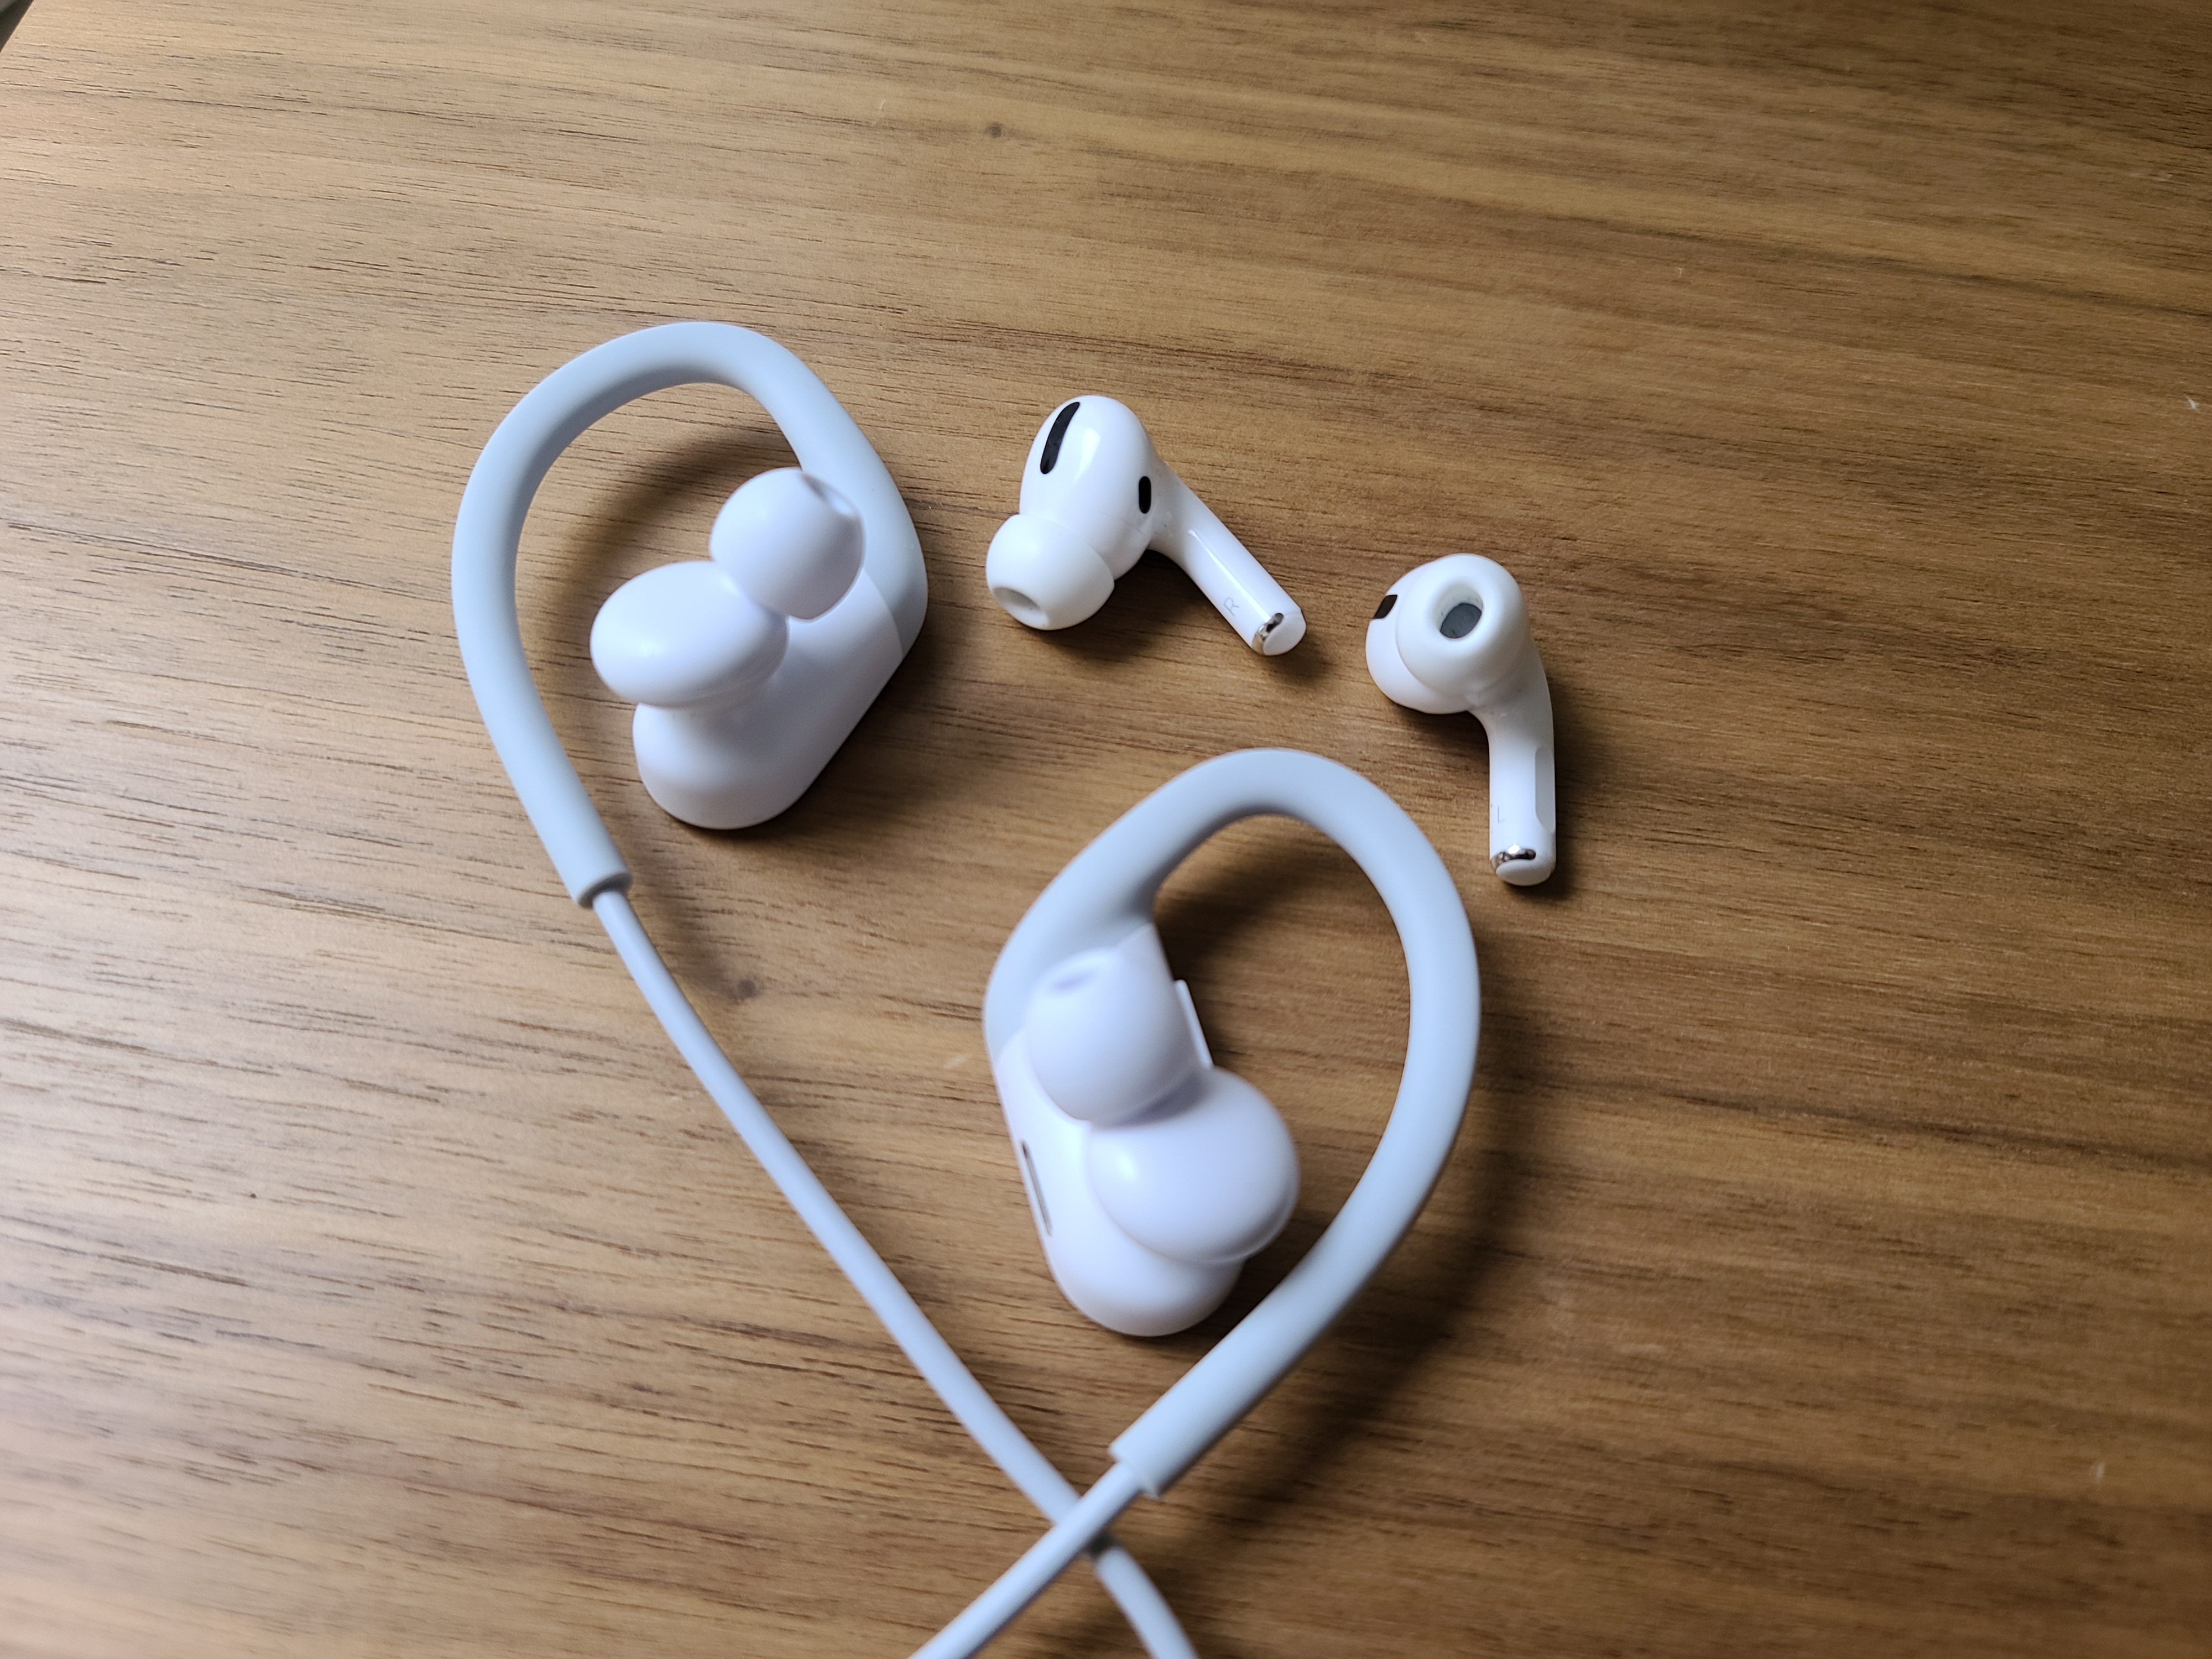
The name is, in part, to distinguish the bluetooth headphones from the well-regarded Powerbeats Pro. The new models adopt a number of new features from those truly wireless earbuds, while maintaining the familiar tethered design.

No doubt some prefer that design. Frankly, I’m a bigger fan of the Pros, though I can see where the ability to let the headphones dangle around one’s neck while not in use would have its appeal. If that’s not a great selling point, how about the headphones’ stated 15 hours of battery life nine on-board hours? Of course, the Pros get a full 24 when you include the giant case. There’s no case for the Powerbeats, though they’ll give you an hour of playback after about five minutes charging via a Lightning cable.

Not convinced? Well, the new headphones run $149 versus the Pro’s $249. Honestly, that’s probably the biggest argument of all here. $100 is a pretty sizable difference. In the press material, Beats is comparing them to the Pros, rather than Powerbeats 3, given that many of the updates bring them up to speed with the higher end devices, including an upgraded design, new components and updates to the wireless radio.

As with the Pros, I appreciate the fit, thanks in large part to the over-ear hooks. They’re bulkier than AirPods, but they do a much better job of taking some of the weight off the front of your ears. They’re also much better at staying put at the gym. Speaking of, they’re rated IPX4 water resistant.

The button setup is similar to the Pros, though they don’t have the same buttons on either side. The right ear has the volume rocker and large Play button and the left has Power/Sync. I suspect the asymmetry is due to the necessary power button the Pros don’t require became of their charging case. I do prefer the double buttons on the Pros, but that’s a small quibble. I’d also prefer USB-C over lightning, but that’s just how Apple rolls.

The new Powerbeats are a nice upgrade — though probably not enough to justify purchase if you own the previous generation. Also, the Pros have the edge on everything but price (though neither, sadly, have active noise canceling yet). But they’ll be a solid buy at $149, when they hit stores March 18.


from TechCrunch https://ift.tt/2Wlps7V

Comments

Popular posts from this blog

How To Play Doom – And More – On An NES

Doom was a breakthrough game for its time, and became so popular that now it’s essentially the “Banana For Scale” of hardware hacking. Doom has been ported to countless devices, most of which have enough processing ability to run the game natively. Recently, this lineup of Doom-compatible devices expanded to include the NES even though the system definitely doesn’t have enough capability to run it without special help. And if you want your own Doom NES cartridge, this video will show you how to build it . We featured the original build from [TheRasteri] a while back which goes into details about how it’s possible to run such a resource-intensive game on a comparatively weak system. You just have to enter the cheat code “RASPI”. After all the heavy lifting is done, it’s time to put it into a realistic-looking cartridge. To get everything to fit in the donor cartridge, first the ICs in the cartridge were removed (except the lockout IC) and replaced with custom ROM chips. Some modifica...

The Flexible Permanence of Copper Tape Circuits

Somewhere between shoving components into a breadboard temporarily and committing them to a piece of protoboard or a PCB lies the copper tape method. This flexible Manhattan-style method of circuitry formed the basis for [Bunnie Huang]’s Chibitronics startup, and has since inspired many to stop etching boards and start fetching hoards of copper tape. [Hales] hit the ground running when he learned about this method , and has made many a copper tape circuit in the last year or so. He offers several nice tips on his site that speak from experience with this method, and he’ll even show you how to easily work an SMD breakout board into the mix. Generally speaking, [Hales] prefers plywood as the substrate to paper or cardboard for durability. He starts by drawing out the circuit and planning where all the tape traces will go and how wide they need to be. Then he lays out copper traces and pads, rubs the tape against the substrate to make it adhere strongly, and reinforces joints and laps w...

The Newbie’s Guide To JTAG

Do you even snarf? If not, it might be because you haven’t mastered the basics of JTAG and learned how to dump, or snarf, the firmware of an embedded device. This JTAG primer will get you up to snuff on snarfing, and help you build your reverse engineering skills. Whatever your motivation for diving into reverse engineering devices with microcontrollers, JTAG skills are a must, and [Sergio Prado]’s guide will get you going. He starts with a description and brief history of the Joint Test Action Group interface, from its humble beginnings as a PCB testing standard to the de facto standard for testing, debugging, and flashing firmware onto devices. He covers how to locate the JTAG pads – even when they’ve been purposely obfuscated – including the use of brute-force tools like the JTAGulator . Once you’ve got a connection, his tutorial helps you find the firmware in flash memory and snarf it up to a file for inspection, modification, or whatever else you have planned. We always apprec...