
OpenAstroTracker Turns Your DSLR Into An Astronomy Instrument

If you want to take beautiful night sky pictures with your DSLR and you live between 15 degrees and 55 degrees north latitude you might want to check out OpenAstroTracker. If you have a 3D printer it will probably take about 60 hours of printing, but you’ll wind up with a pretty impressive setup for your camera. There’s an Arduino managing the tracking and also providing a “go to” capability.

The design is over on Thingiverse and you can find code on GitHub. There’s also a Reddit dedicated to the project. The tracker touts its ability to handle long or heavy lenses and to target 180 degrees in every direction.

Some of the parts you must print are specific to your latitude to within 5 degrees, so if you live at latitude 43 degrees, you could pick the 40-degree versions of the parts. So far though, you must be in the Northern hemisphere between 15 and 55 degrees.

What kind of images can you expect? The site says this image of Andromeda was taken over several nights using a Soligor 210mm f/4 lens with ISO 800 film.

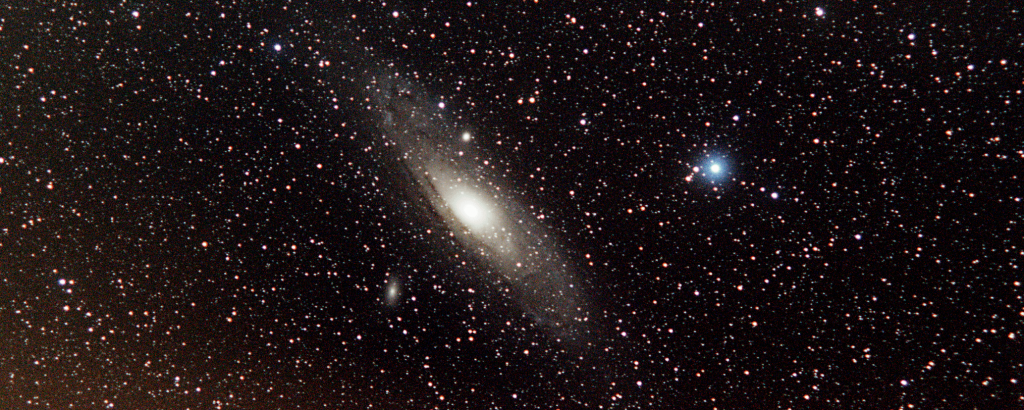
Not bad at all! Certainly not the view from our $25 department store telescope.

If you’d rather skip the Arduino, try a cheap clock movement. Or you can replace the clock and the Arduino with yourself.


from Hackaday https://ift.tt/39buW97

Comments

Popular posts from this blog

How To Play Doom – And More – On An NES

Doom was a breakthrough game for its time, and became so popular that now it’s essentially the “Banana For Scale” of hardware hacking. Doom has been ported to countless devices, most of which have enough processing ability to run the game natively. Recently, this lineup of Doom-compatible devices expanded to include the NES even though the system definitely doesn’t have enough capability to run it without special help. And if you want your own Doom NES cartridge, this video will show you how to build it . We featured the original build from [TheRasteri] a while back which goes into details about how it’s possible to run such a resource-intensive game on a comparatively weak system. You just have to enter the cheat code “RASPI”. After all the heavy lifting is done, it’s time to put it into a realistic-looking cartridge. To get everything to fit in the donor cartridge, first the ICs in the cartridge were removed (except the lockout IC) and replaced with custom ROM chips. Some modifica...

The Flexible Permanence of Copper Tape Circuits

Somewhere between shoving components into a breadboard temporarily and committing them to a piece of protoboard or a PCB lies the copper tape method. This flexible Manhattan-style method of circuitry formed the basis for [Bunnie Huang]’s Chibitronics startup, and has since inspired many to stop etching boards and start fetching hoards of copper tape. [Hales] hit the ground running when he learned about this method , and has made many a copper tape circuit in the last year or so. He offers several nice tips on his site that speak from experience with this method, and he’ll even show you how to easily work an SMD breakout board into the mix. Generally speaking, [Hales] prefers plywood as the substrate to paper or cardboard for durability. He starts by drawing out the circuit and planning where all the tape traces will go and how wide they need to be. Then he lays out copper traces and pads, rubs the tape against the substrate to make it adhere strongly, and reinforces joints and laps w...

The Newbie’s Guide To JTAG

Do you even snarf? If not, it might be because you haven’t mastered the basics of JTAG and learned how to dump, or snarf, the firmware of an embedded device. This JTAG primer will get you up to snuff on snarfing, and help you build your reverse engineering skills. Whatever your motivation for diving into reverse engineering devices with microcontrollers, JTAG skills are a must, and [Sergio Prado]’s guide will get you going. He starts with a description and brief history of the Joint Test Action Group interface, from its humble beginnings as a PCB testing standard to the de facto standard for testing, debugging, and flashing firmware onto devices. He covers how to locate the JTAG pads – even when they’ve been purposely obfuscated – including the use of brute-force tools like the JTAGulator . Once you’ve got a connection, his tutorial helps you find the firmware in flash memory and snarf it up to a file for inspection, modification, or whatever else you have planned. We always apprec...